ConceptLab
Overview
ConceptLab is available in Preview. Its interface and supported operations may change as the workflow develops.
ConceptLab is StudioTwin's visual workspace for developing Concepts. Create a Character or Object Concept, generate or upload a starting image, refine it with written instructions, compare versions, and choose the image you want to take forward.
Open ConceptLab directly, or sign in to the StudioTwin Dashboard and select ConceptLab in the sidebar.
Before you start
- Create a StudioTwin account and sign in.
- Review How Credits Work before generating or editing an image. These operations consume credits; creating an empty Concept and reviewing existing assets do not.
- Prepare a clear subject description or a reference image you are authorized to use.
Create and refine a Concept
- Create a Concept and choose Character or Object as its Concept Type.
- Give it a descriptive name so you can find it in your Concepts collection.
- Create the first image from a prompt, or upload a reference image to establish the starting direction.
- Select the current image and describe the change you want. Be specific about what should change and what should stay consistent.
- Wait for the new image to finish, then review the result in the image history.
- Select an earlier image if you want to inspect it or use it as the starting point for another direction.
- Compare an earlier image with your current image, then download or continue editing the version you choose.
Preview an asset
ConceptLab keeps completed images with the Concept instead of replacing the previous result. The history identifies your current image and lets you preview, compare, download, or select another version.
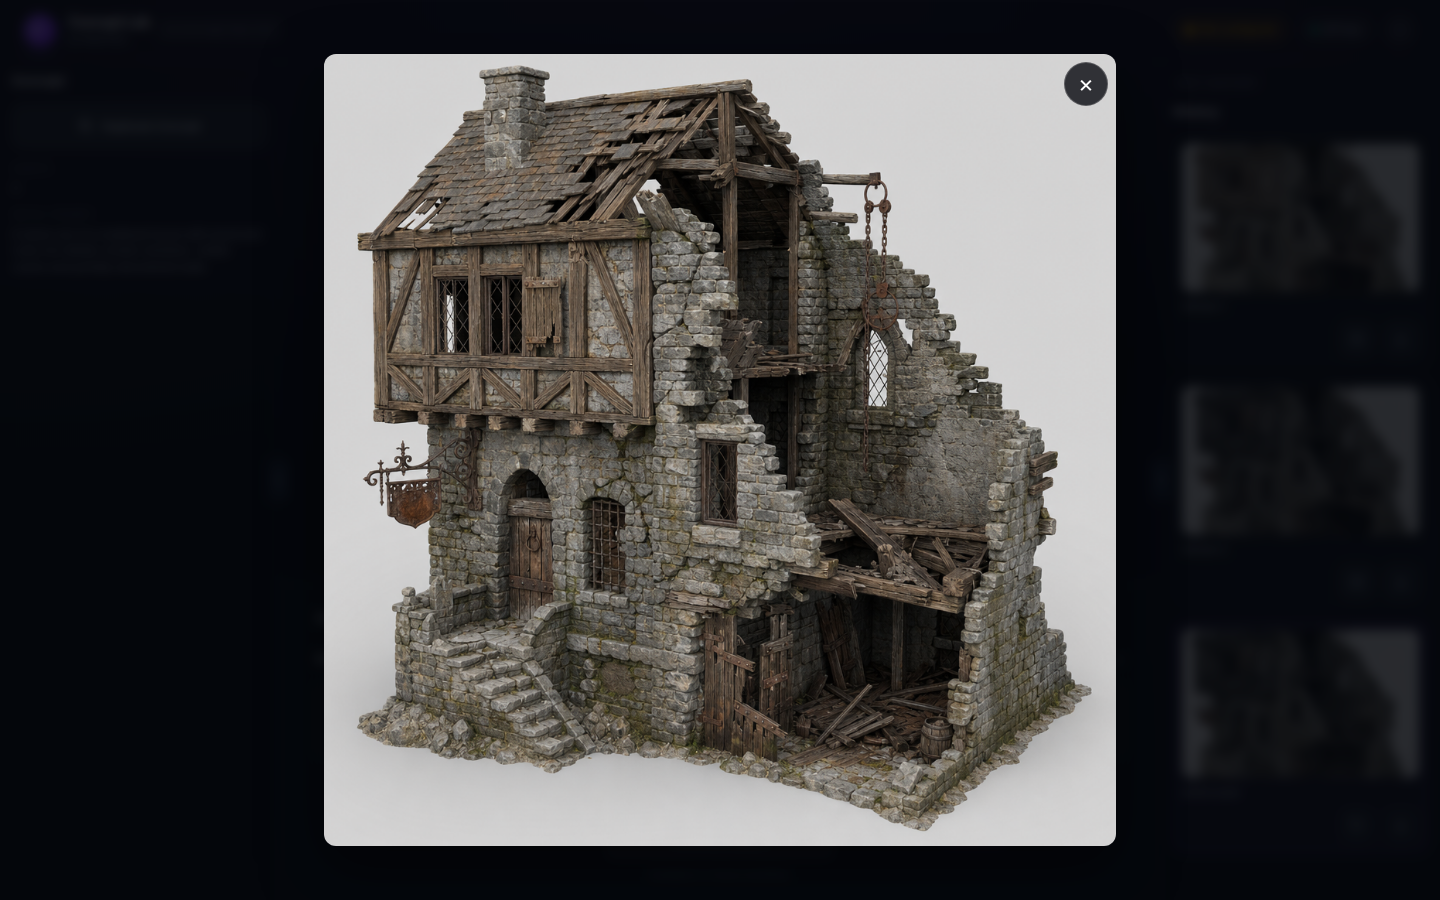
The full-screen preview focuses on the selected image. Close it to return to the History panel and its asset controls.
The selected image is the starting point for your next edit. Selecting another version lets you explore a different direction without removing any images.
Compare two versions
Use the comparison view to reveal differences between two completed images. Drag the divider across the image to inspect which details changed and which remained stable.
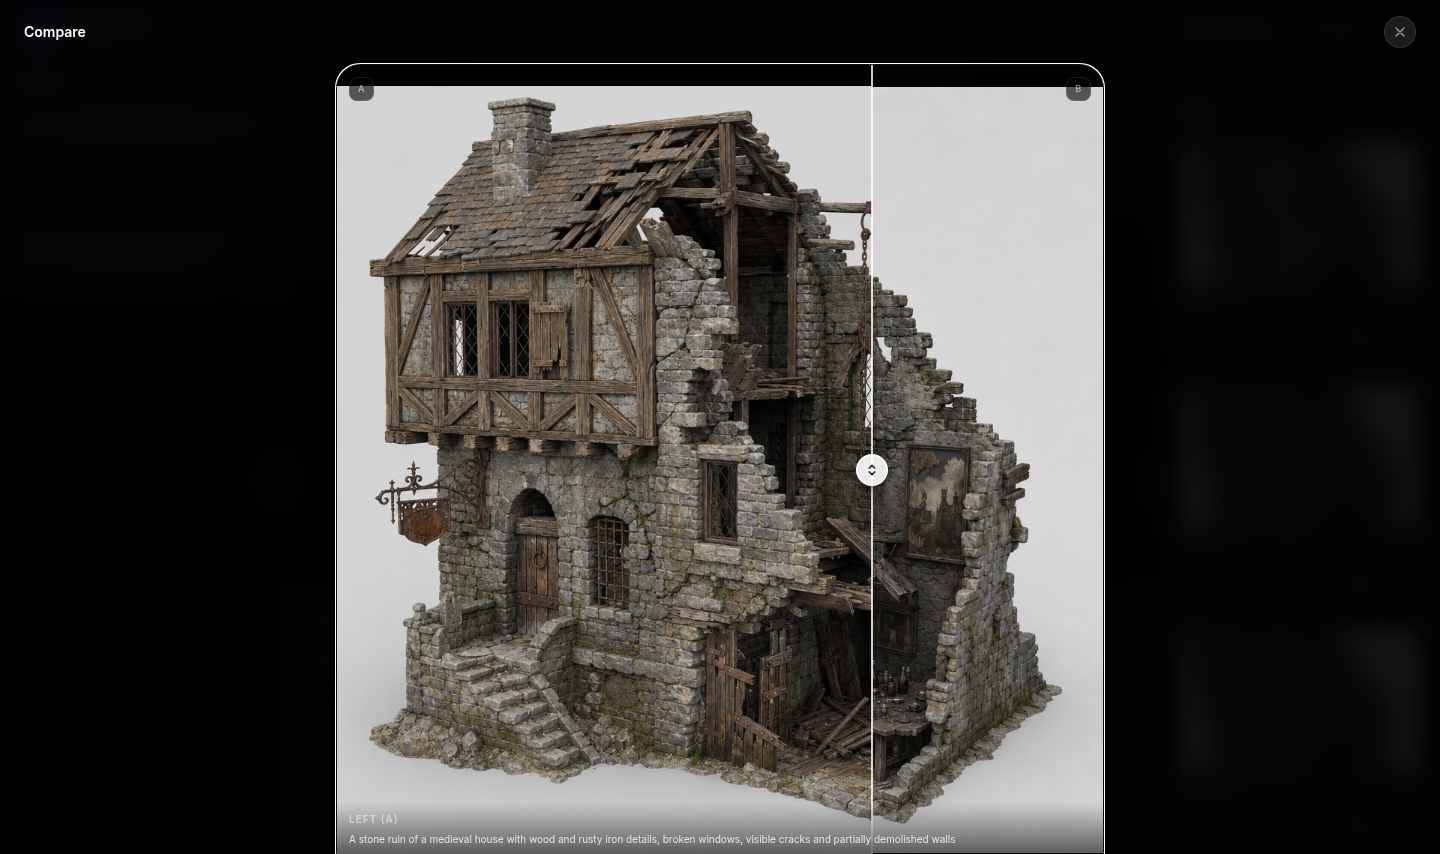
The reveal divider compares two versions in the same frame. The image prompt remains visible for context.
Example image edits
A focused edit instruction can change a local design detail while preserving the subject, camera, and surrounding structure.
Object: change a functional accent
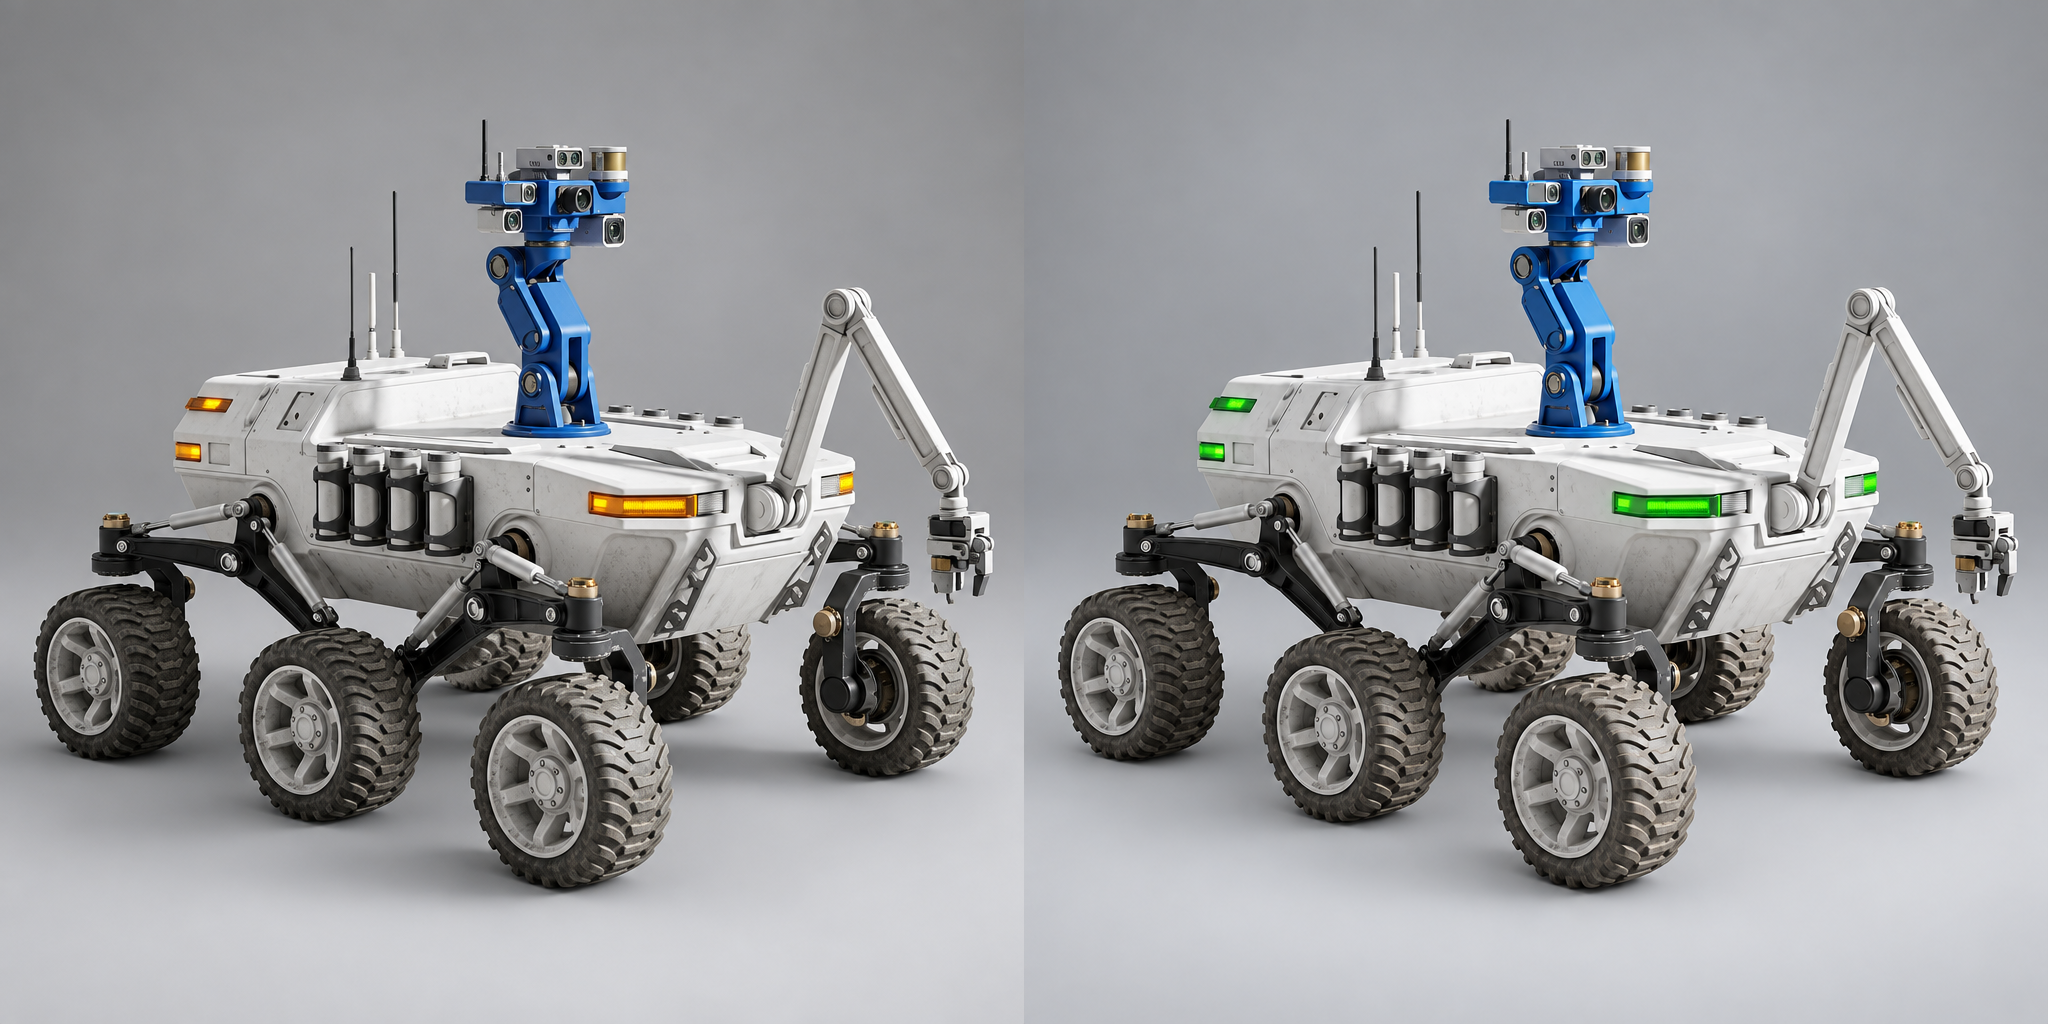
Left: the initial lunar rover. Right: an edited version with the hazard lights changed from amber to green while the rover design and composition remain consistent.
Character: change a prop finish
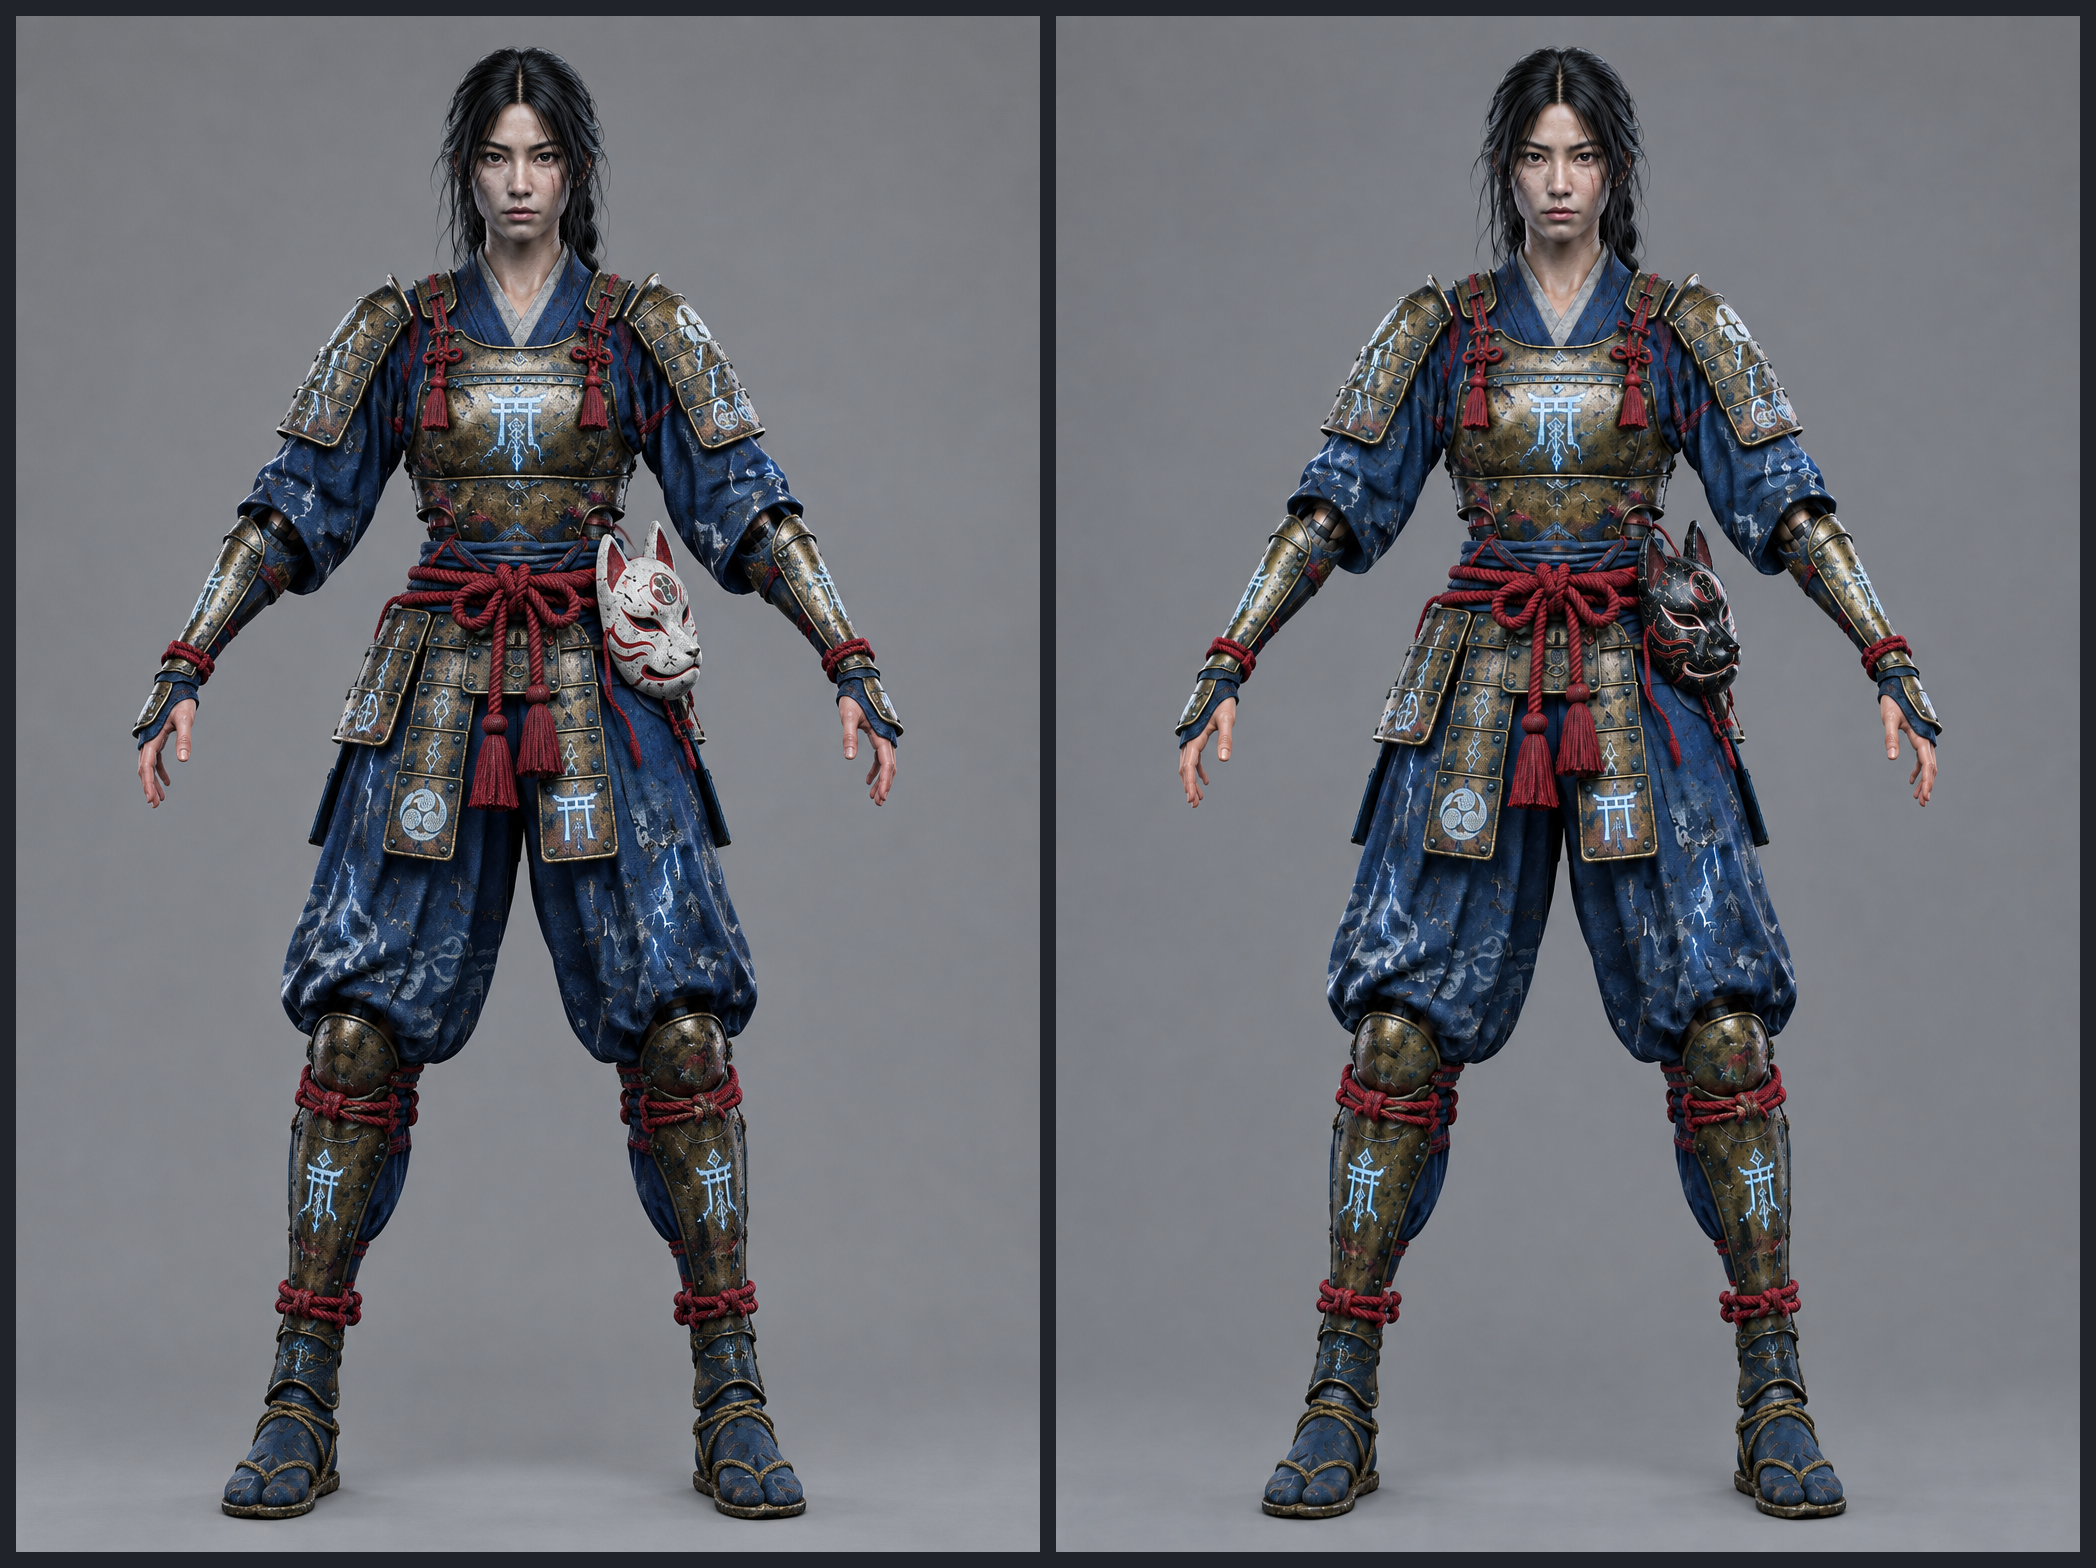
Left: the initial armored character with a light ceramic fox mask. Right: an edited version with a black-lacquer mask while the pose, costume, and framing remain consistent.
Generated results can vary. Review the entire image rather than assuming an edit changed only the requested detail.
Continue into 3D
Once you choose a direction, the resulting image is prepared for use with downstream 3D mesh generation tools. You can also work with Concepts through StudioTwin Web MCP, or use Unreal Engine MCP when your workflow continues in an open UE project.
Character rigging is Coming soon.
Current limitations
- ConceptLab is a Preview feature.
- ConceptLab currently creates and edits Character and Object Concepts.
- Generation and editing consume credits. Review each result before continuing from it.
- A completed Concept image is not a 3D asset. Use it as input for a downstream 3D mesh generation workflow.